Bridging in and out of your Orbit rollup
This guide covers how to bridge in (deposit) and bridge out (withdrawal) from your Arbitrum Orbit L3 rollup.
This guide will cover bridging in and out of your Orbit rollup.
Below are two example transactions, one of a deposit and one of a withdrawal:

Bridge in (deposit) to your rollup
Step 1: Add your custom chain config
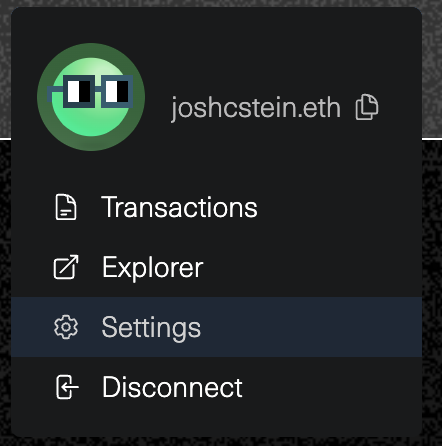
(1a) In the Arbitrum Bridge UI, click the menu dropdown in the top right. Select Settings.
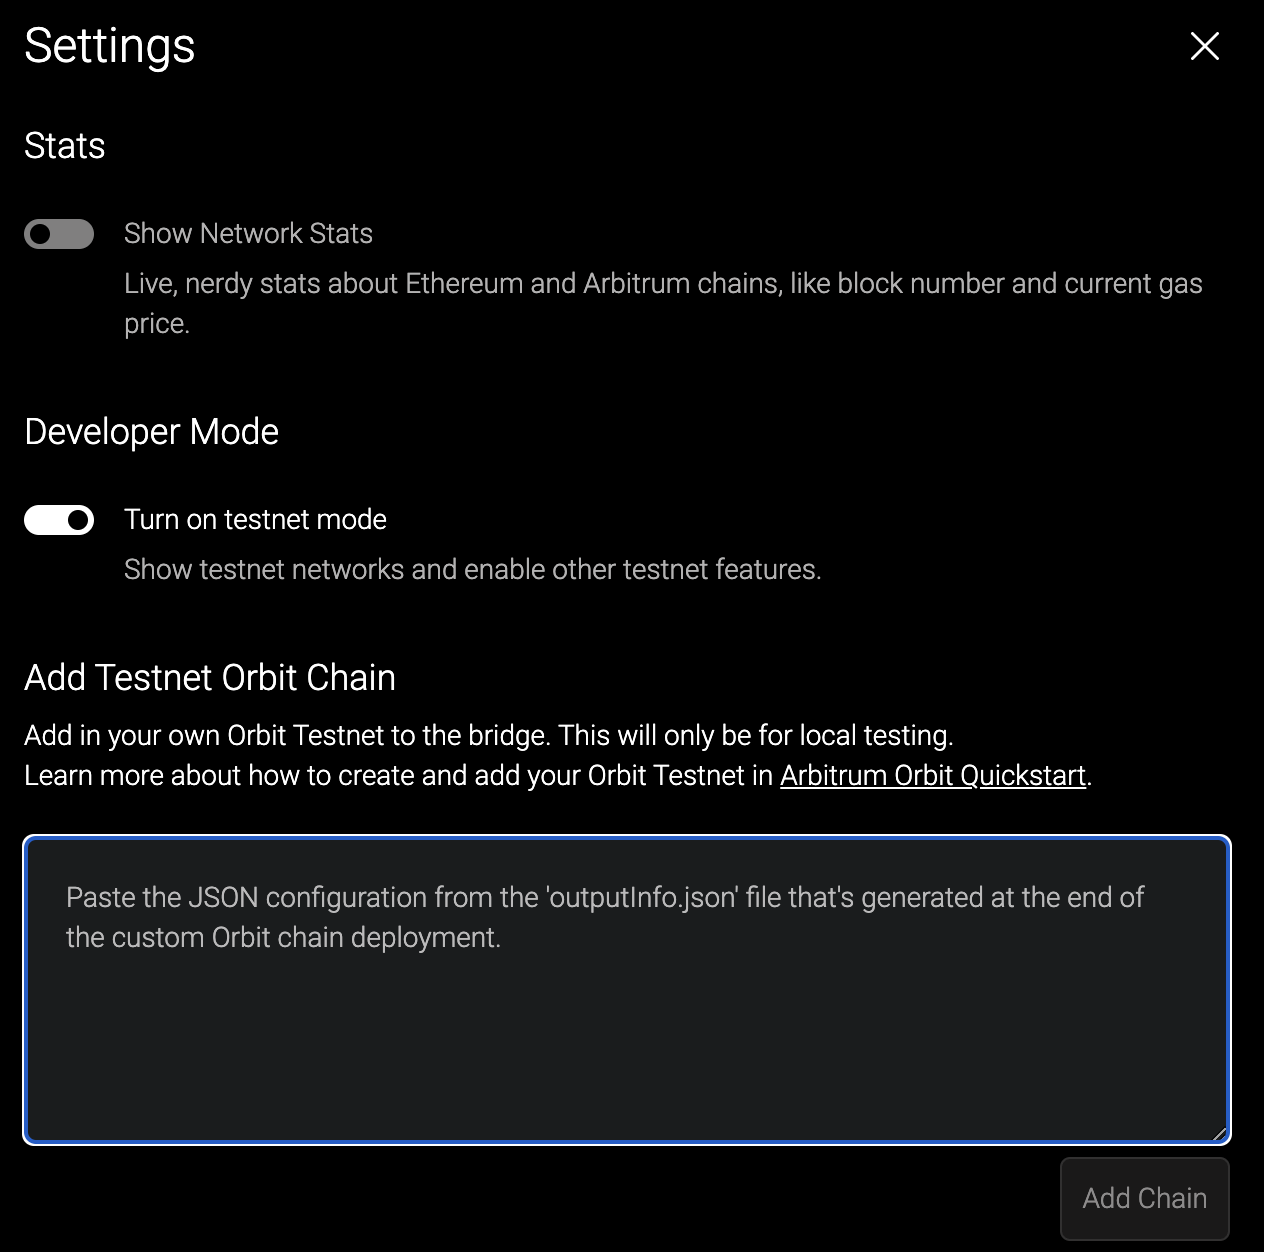
(1b) Under Developer Mode, select Turn on testnet mode. Add your custom chain config from outputInfo.json in the root of your orbit-setup-script directory.
(1c) You'll then see the chain under Live Orbit Chains:

Step 2: Deposit to your Orbit rollup
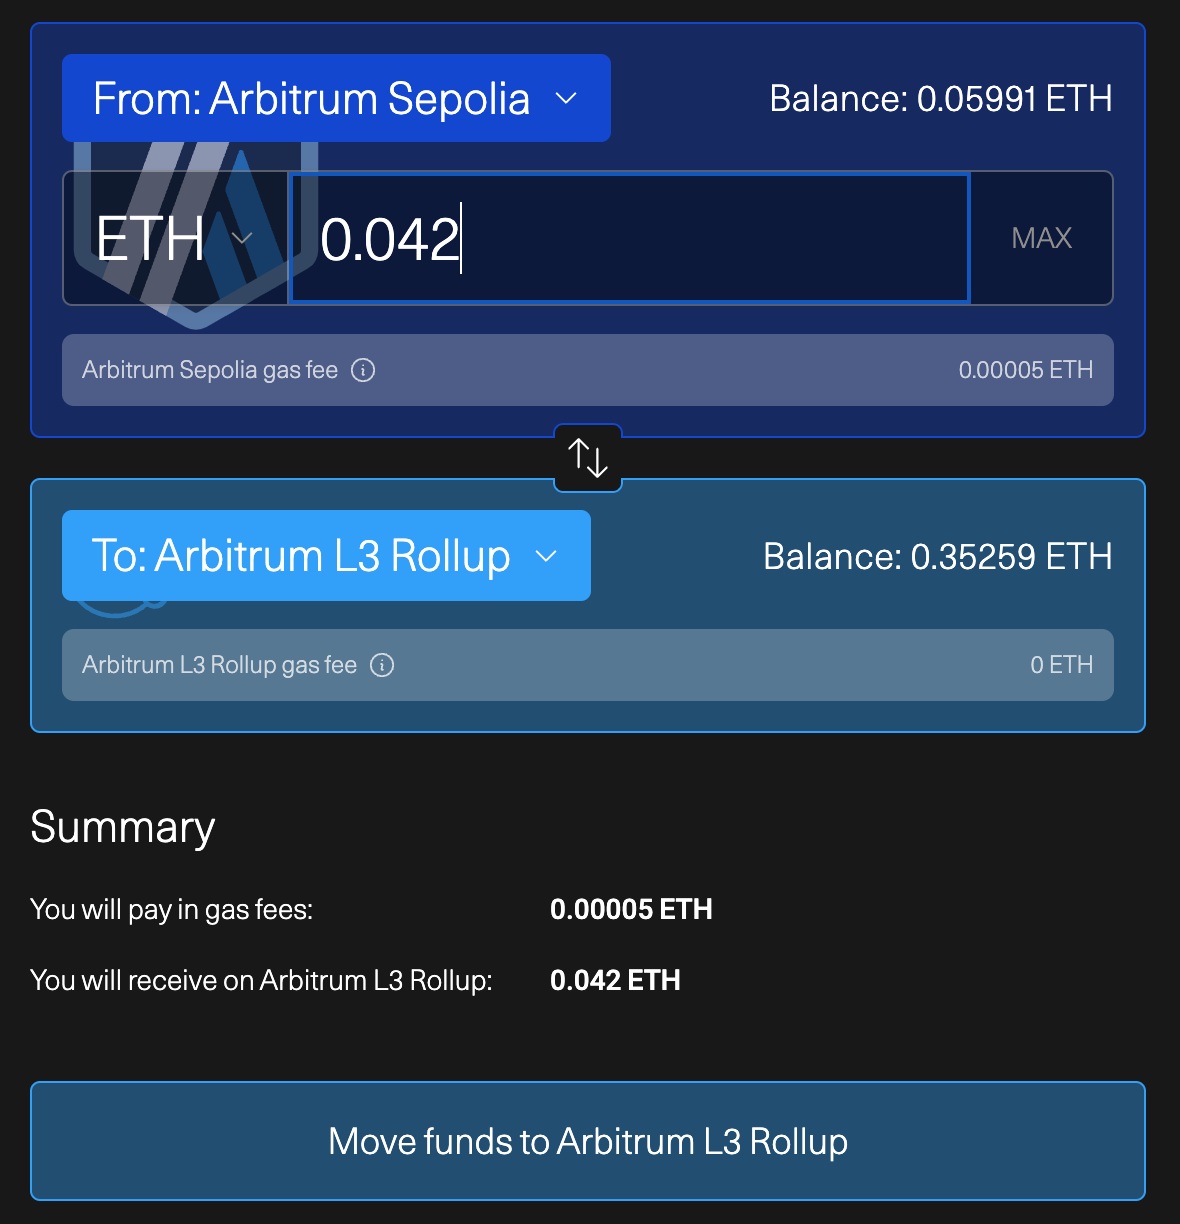
(2a) Choose an amount of Arbitrum Sepolia ETH to bridge into your rollup. Click Move funds to <YOUR_ROLLUP_NAME>, in this case Move funds to Arbitrum L3 Rollup. Approve the transaction in your wallet.
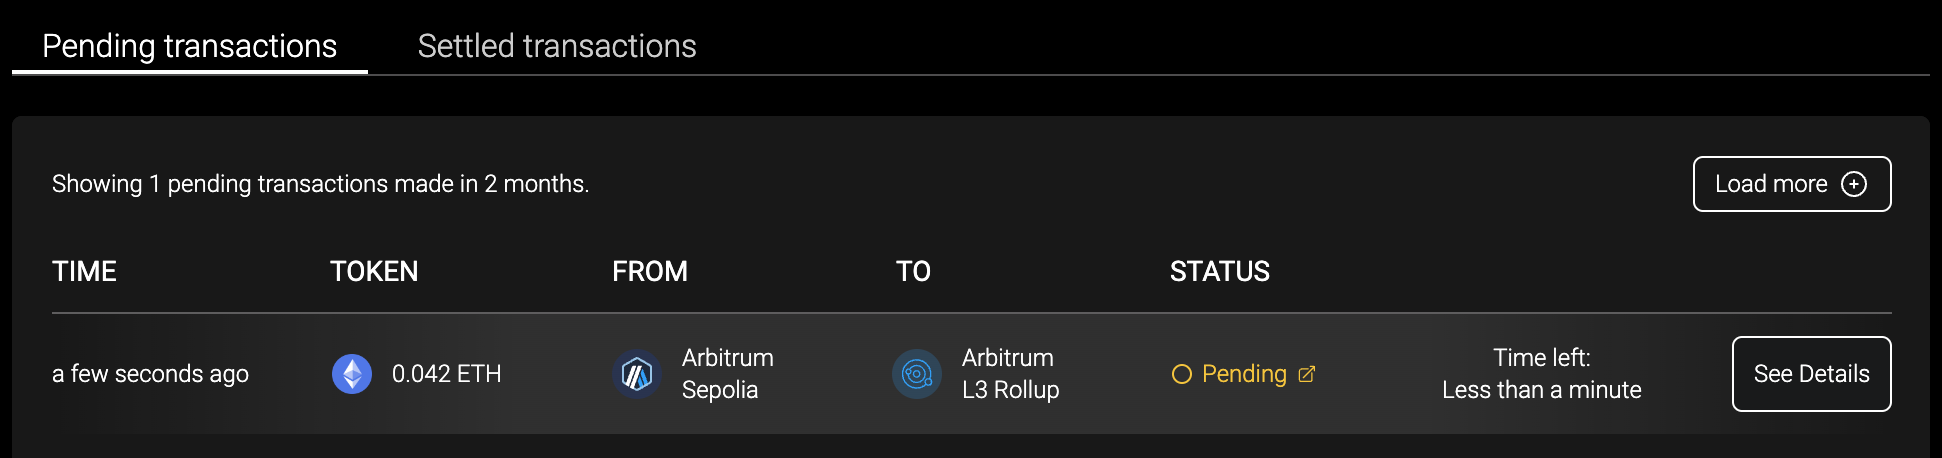
(2b) You'll then see it load in the Pending transactions tab:
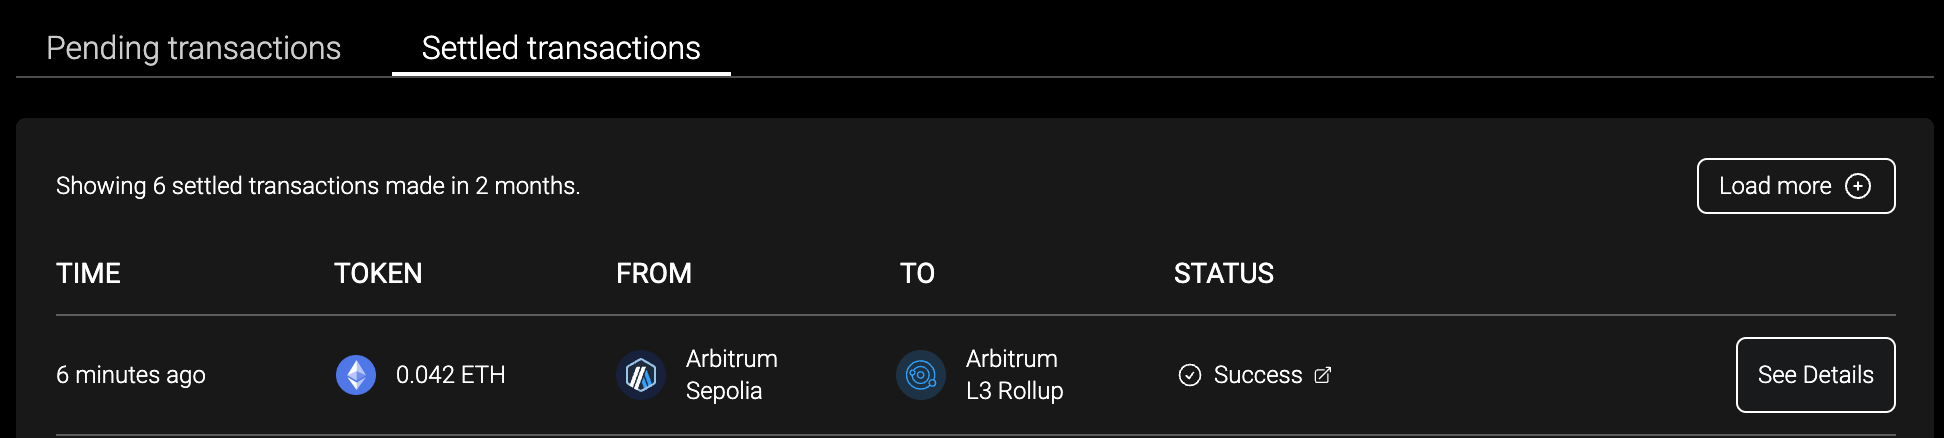
(2c) Shortly after, in the Settled transactions tab you can see the transaction status. Click Success.
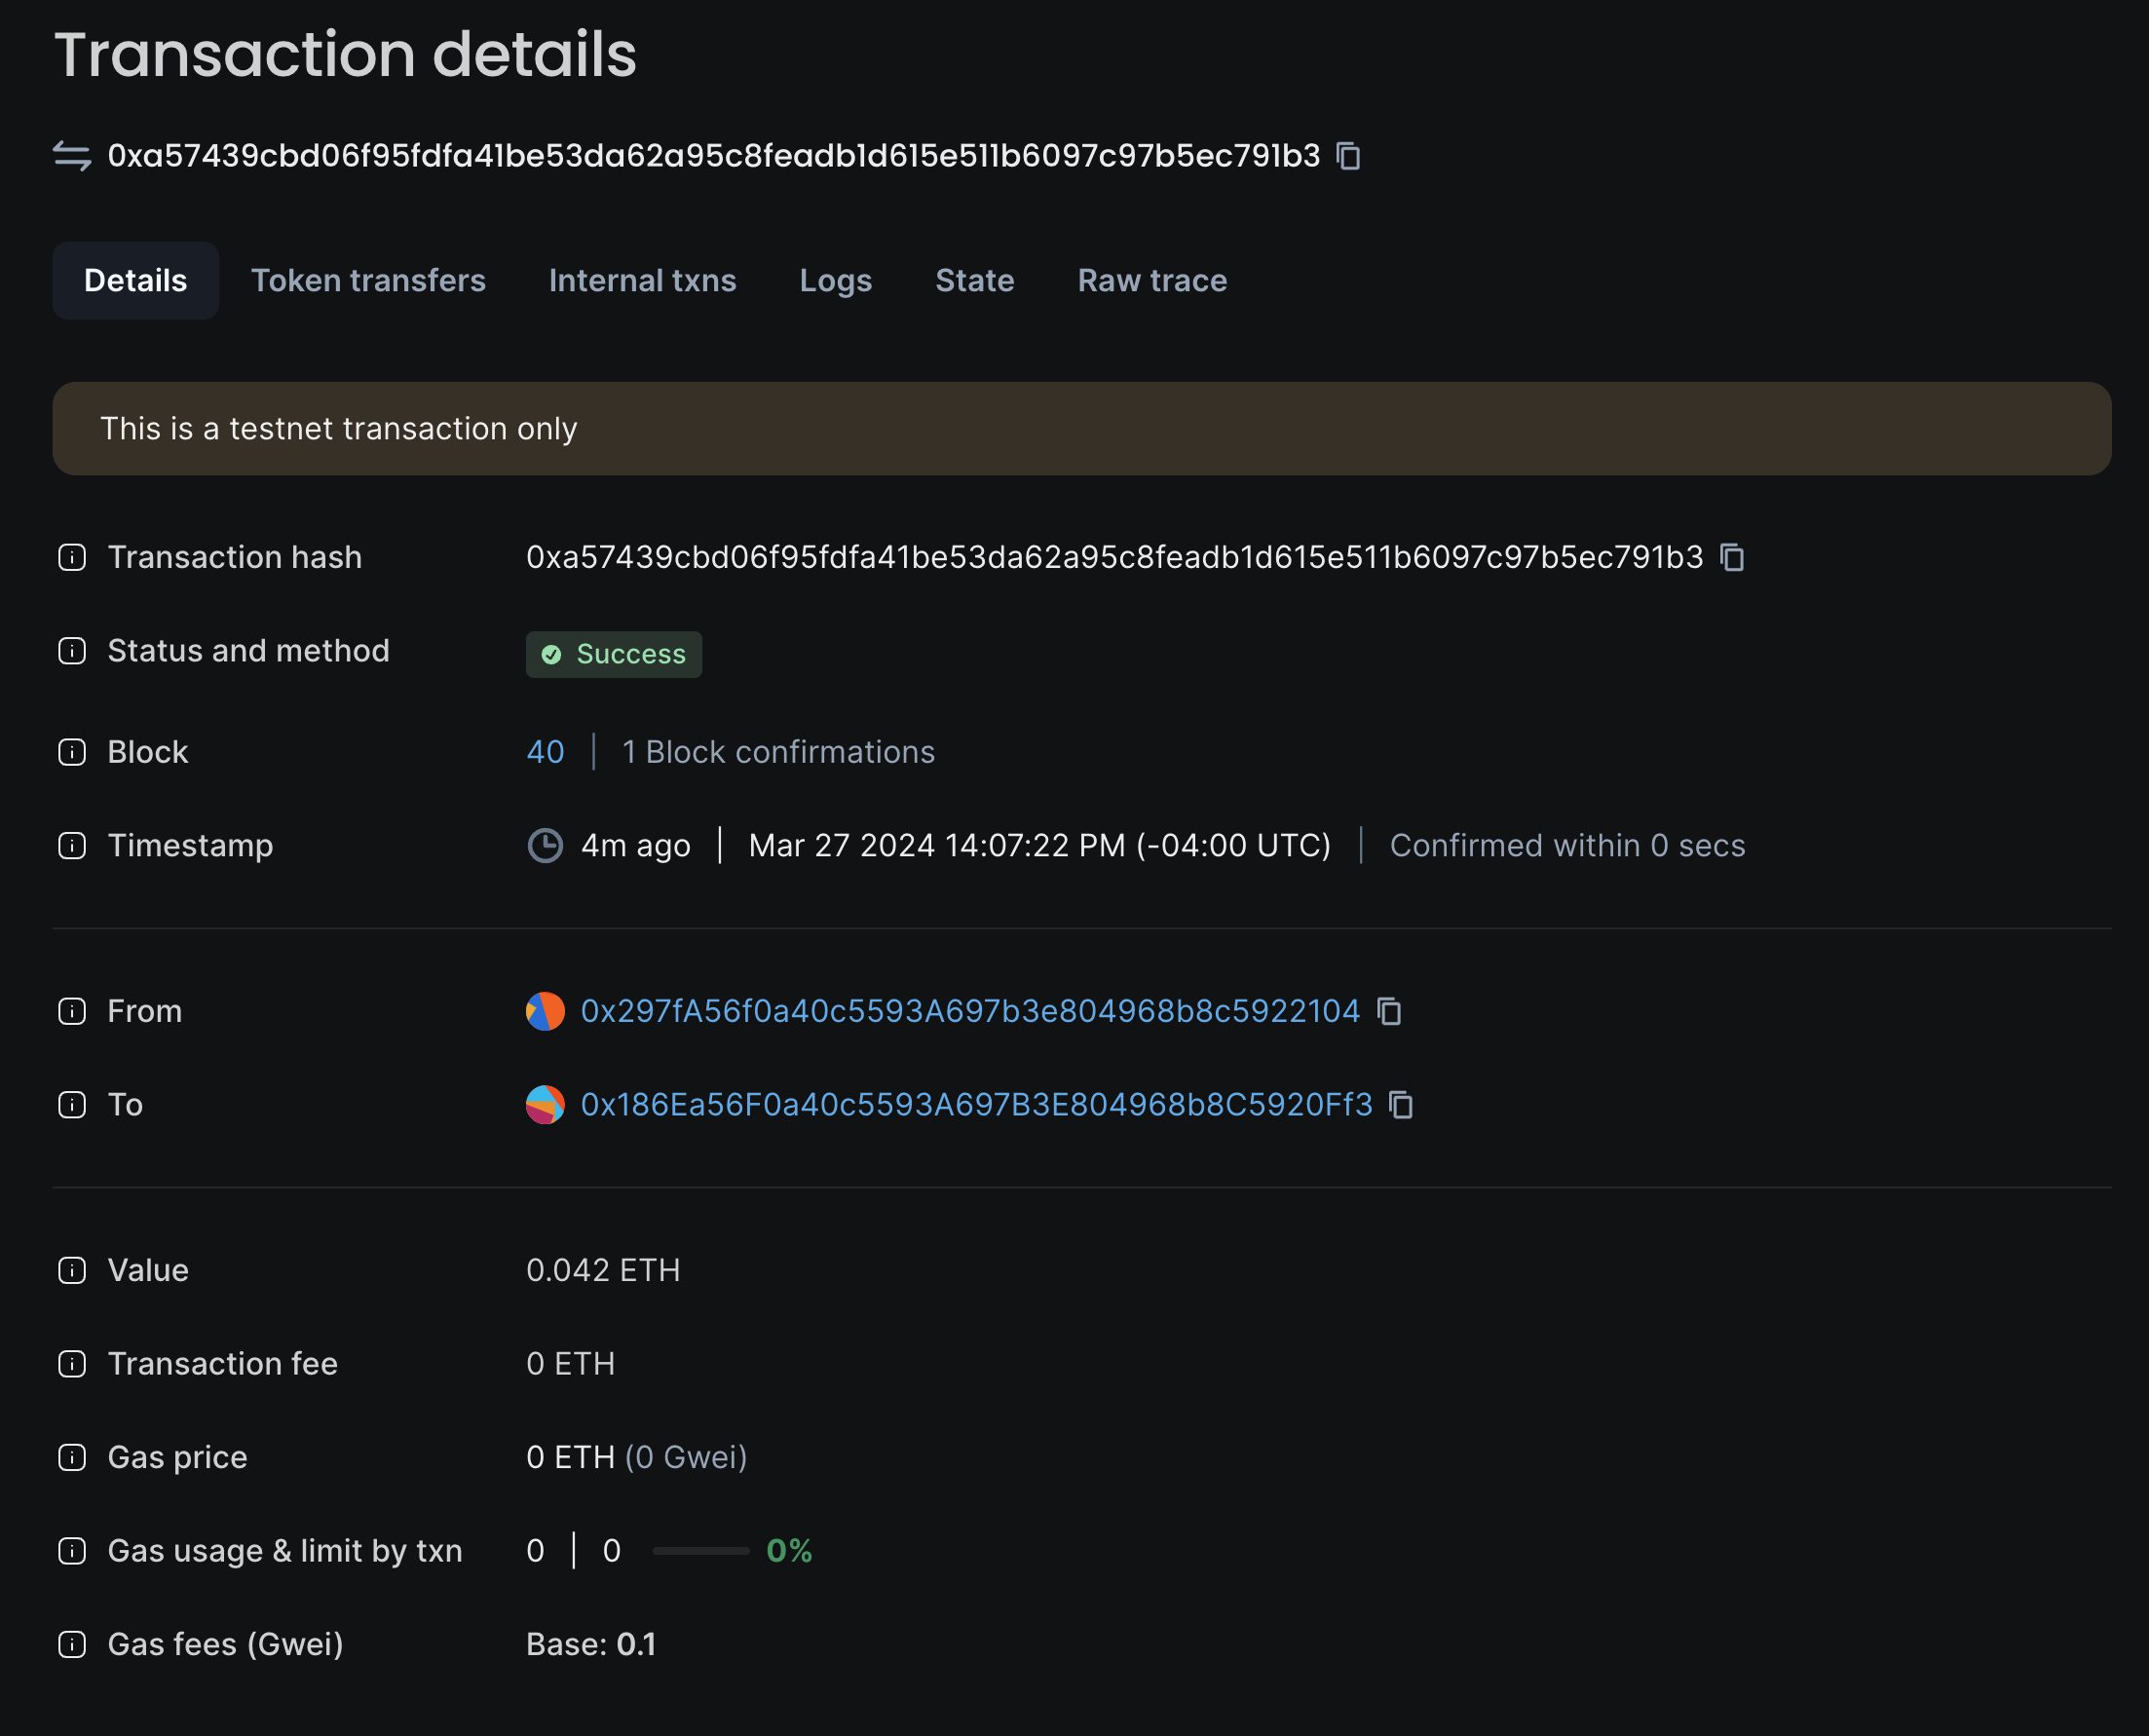
(2d) View the transaction on your local instance of Blockscout for your rollup:
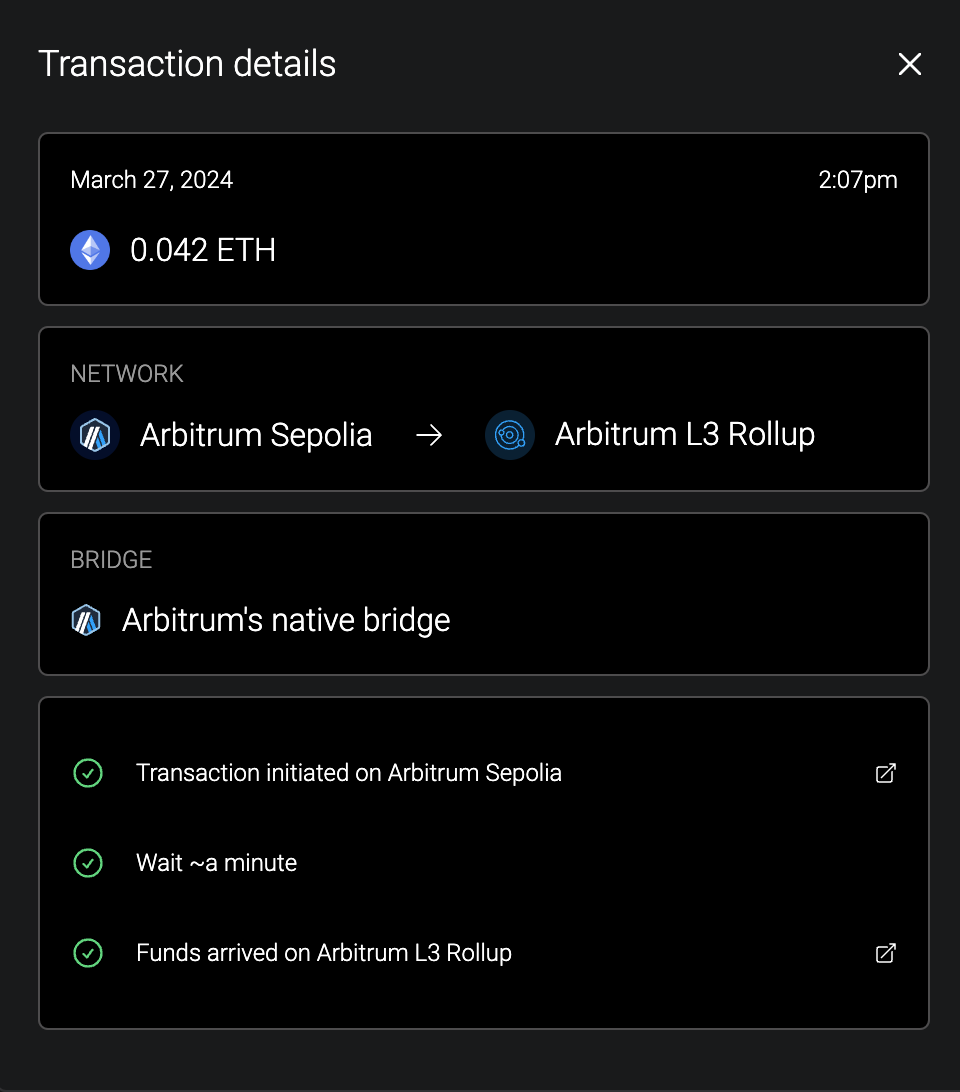
(2e) Optionally, click See Details for an overview of your deposit:
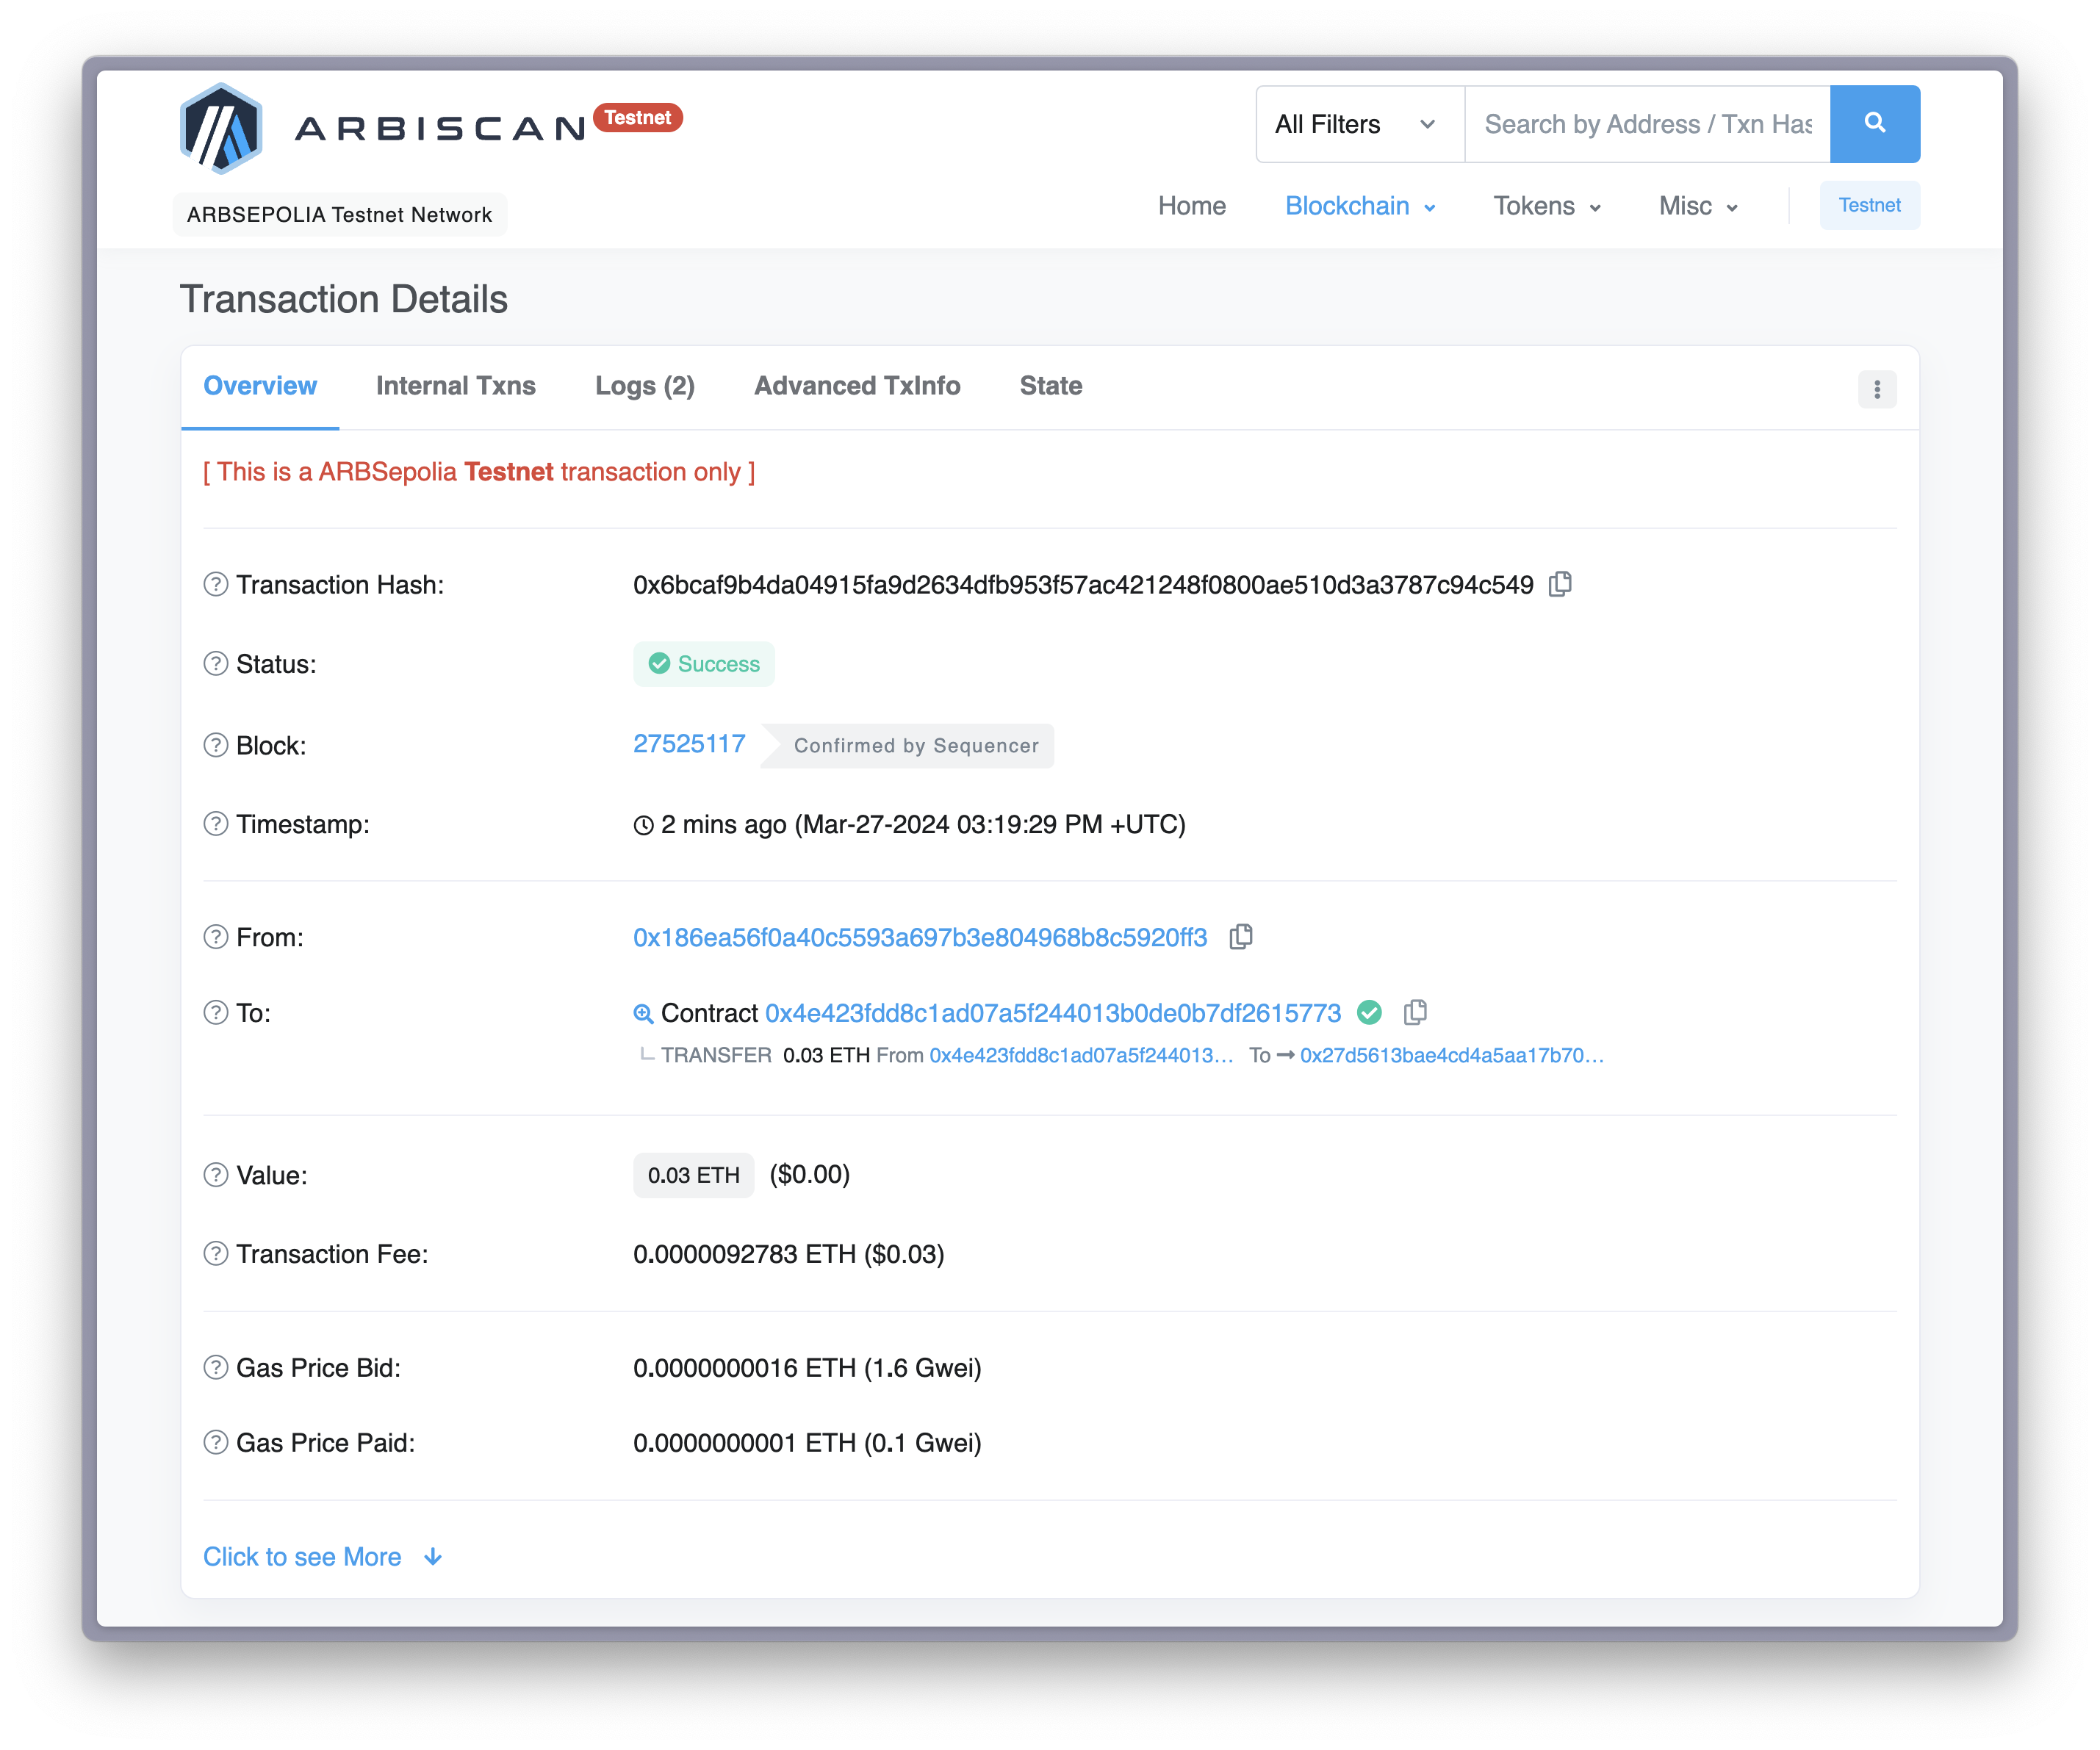
(2f) From the details page, you can also see the transaction for your deposit on Arbitrum Sepolia:
Bridge out (withdrawal) from your rollup
Step 1: Choose an amount to withdraw from your rollup
(1a) In the Arbitrum Bridge UI, choose your origin chain to your Arbitrum L3 Rollup and the destination chain as Arbitrum Sepolia.
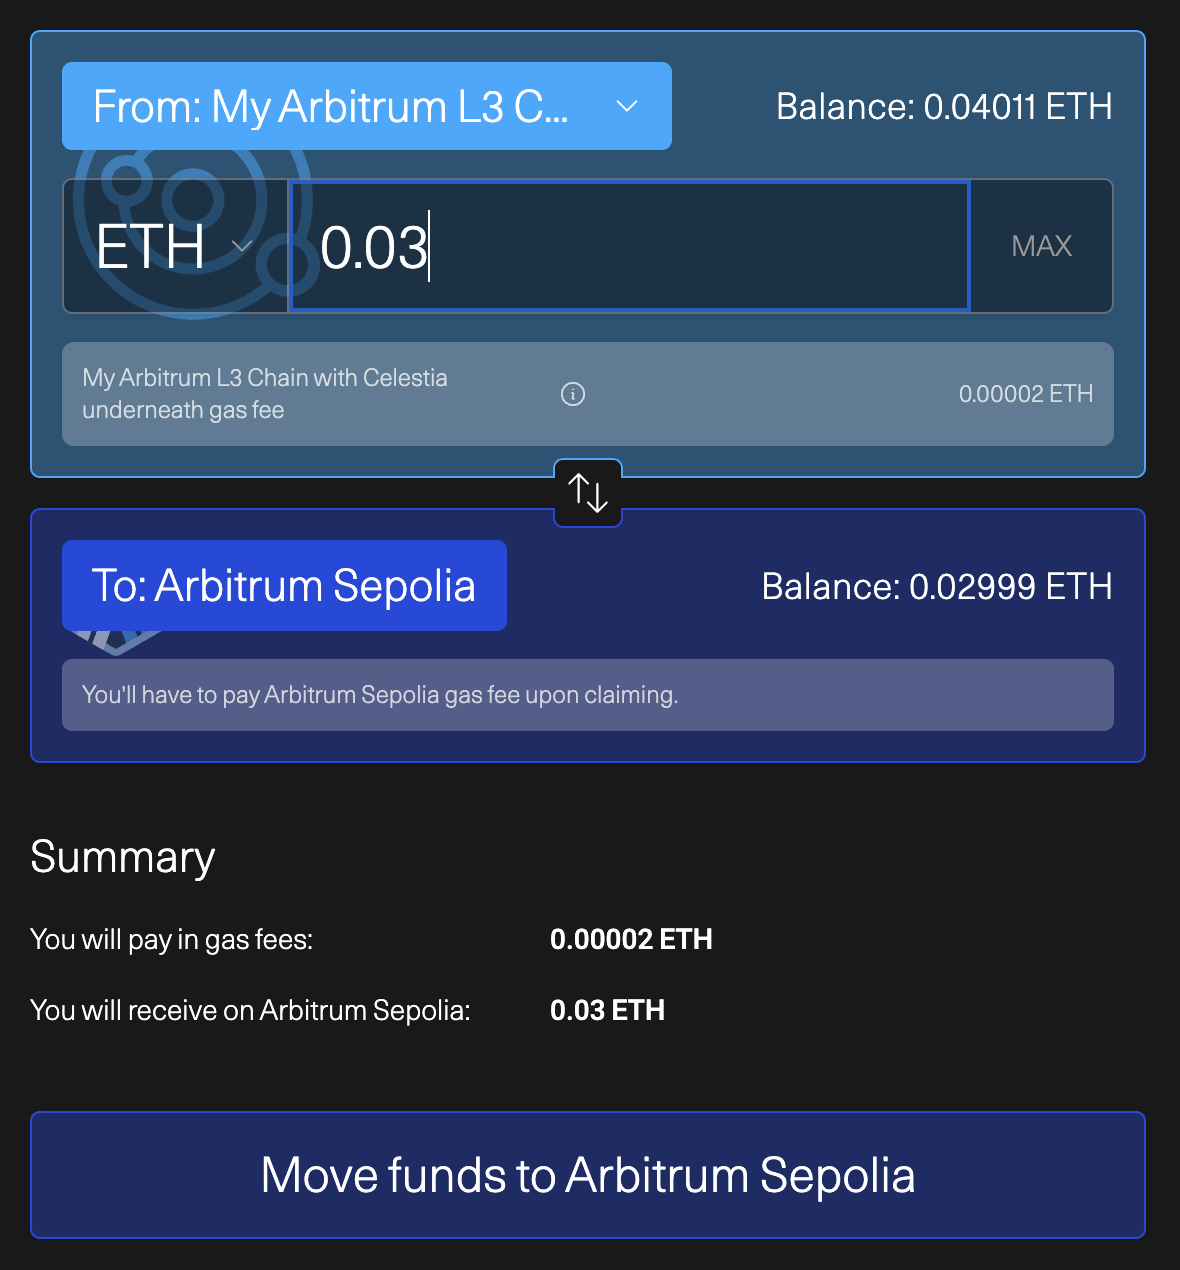
(1b) Click Move funds to Arbitrum Sepolia and read the disclaimer, check the boxes, and click Continue.
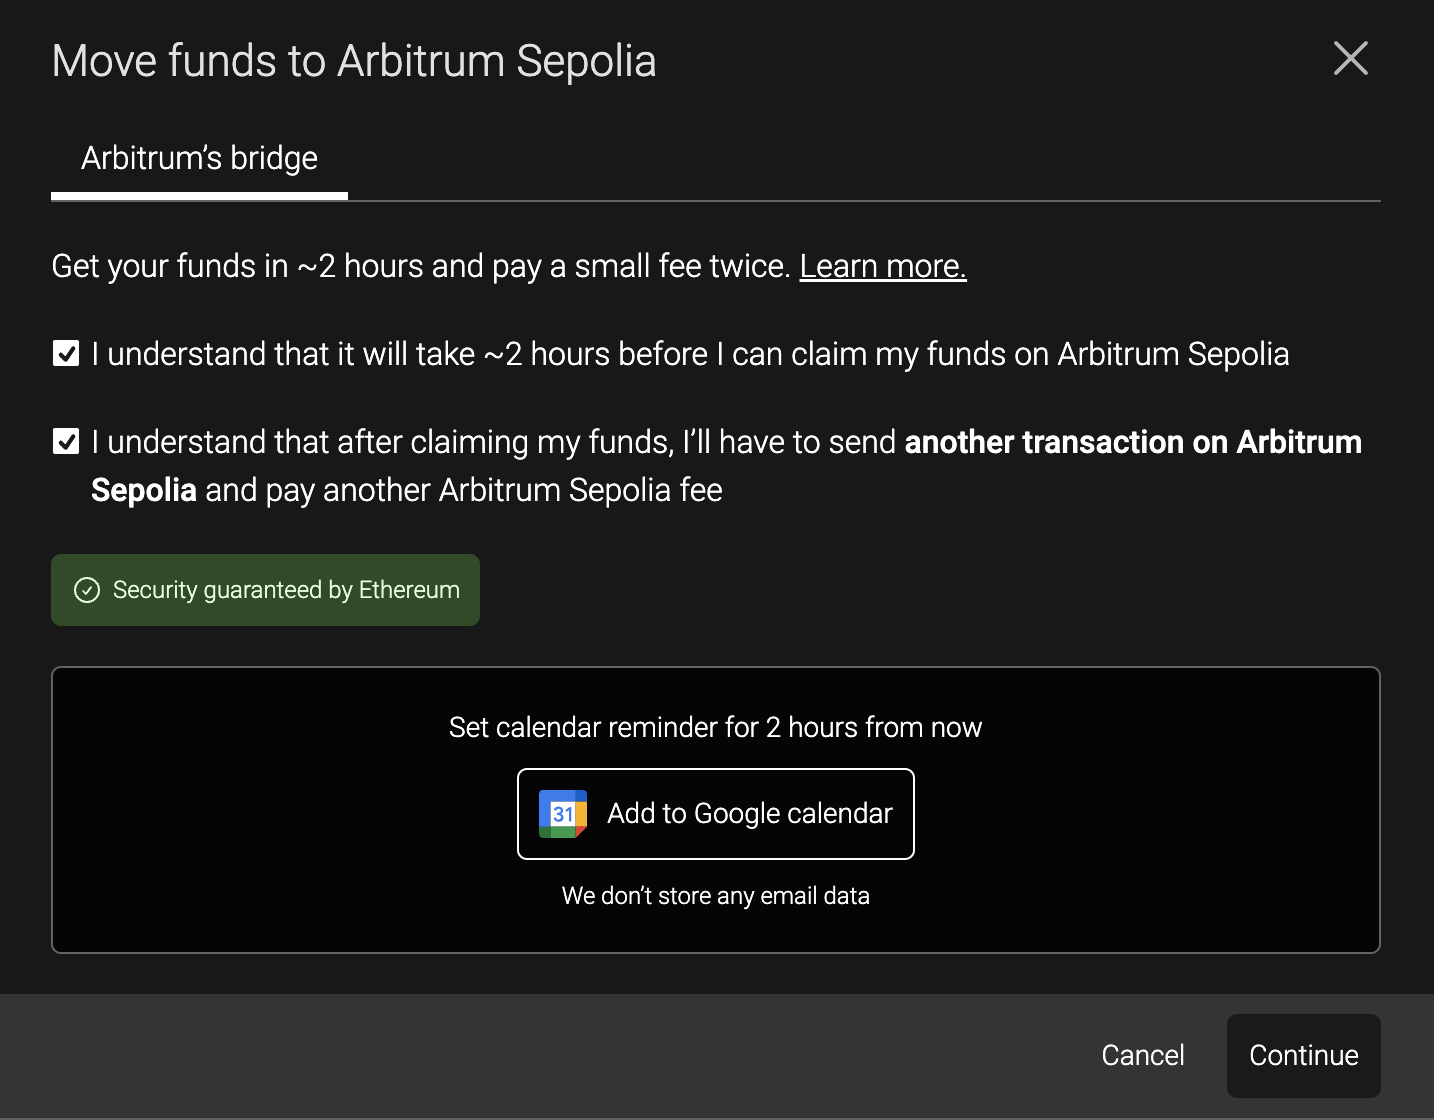
(1c) Optionally, set a reminder on your calendar so you don't forget.
(1d) After approving the transaction in your wallet, you'll be able to see the transaction in the Pending transactions tab:
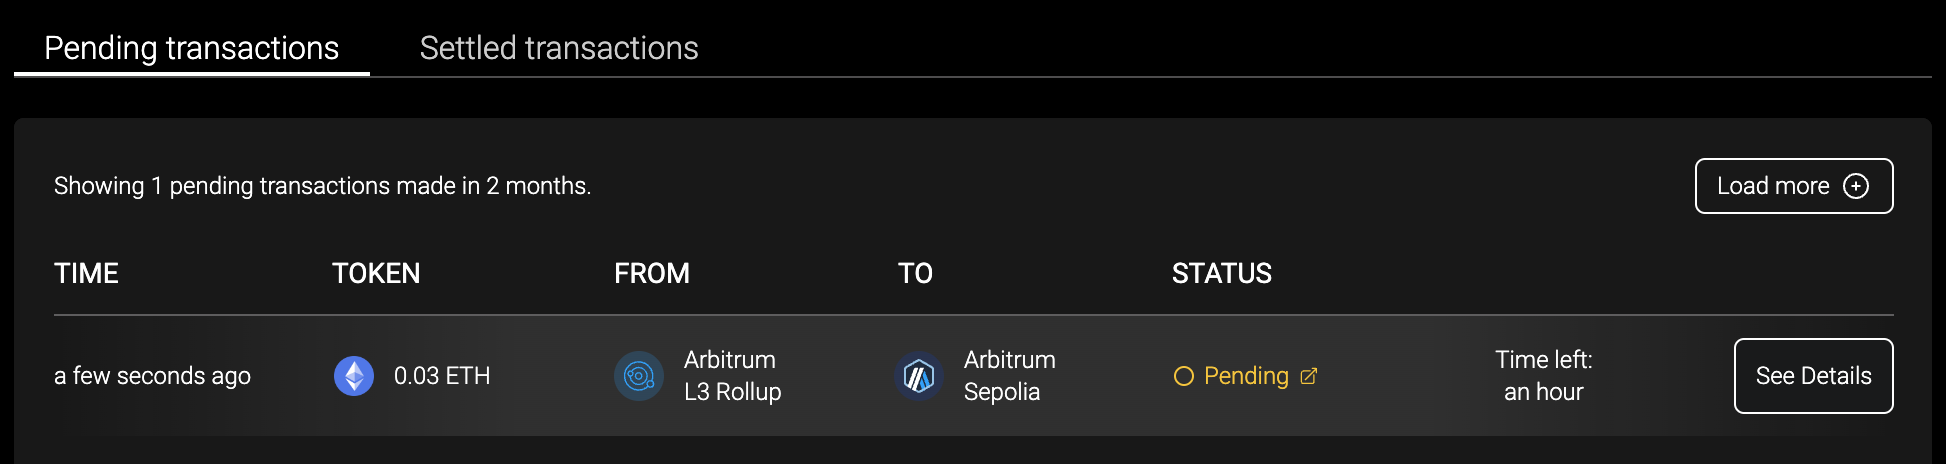
After approximately two hours, you will be able to proceed to Step 2: Claim your withdrawal.
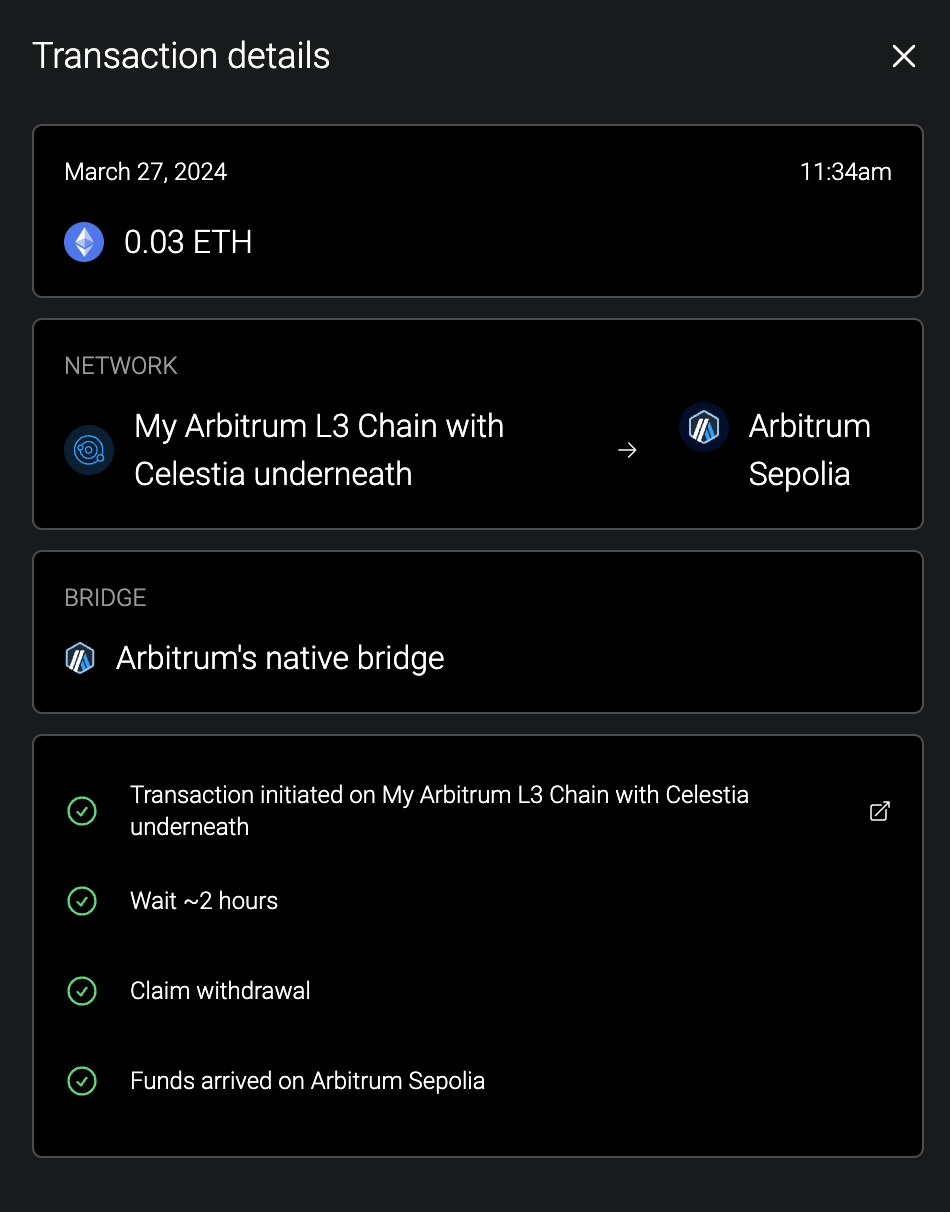
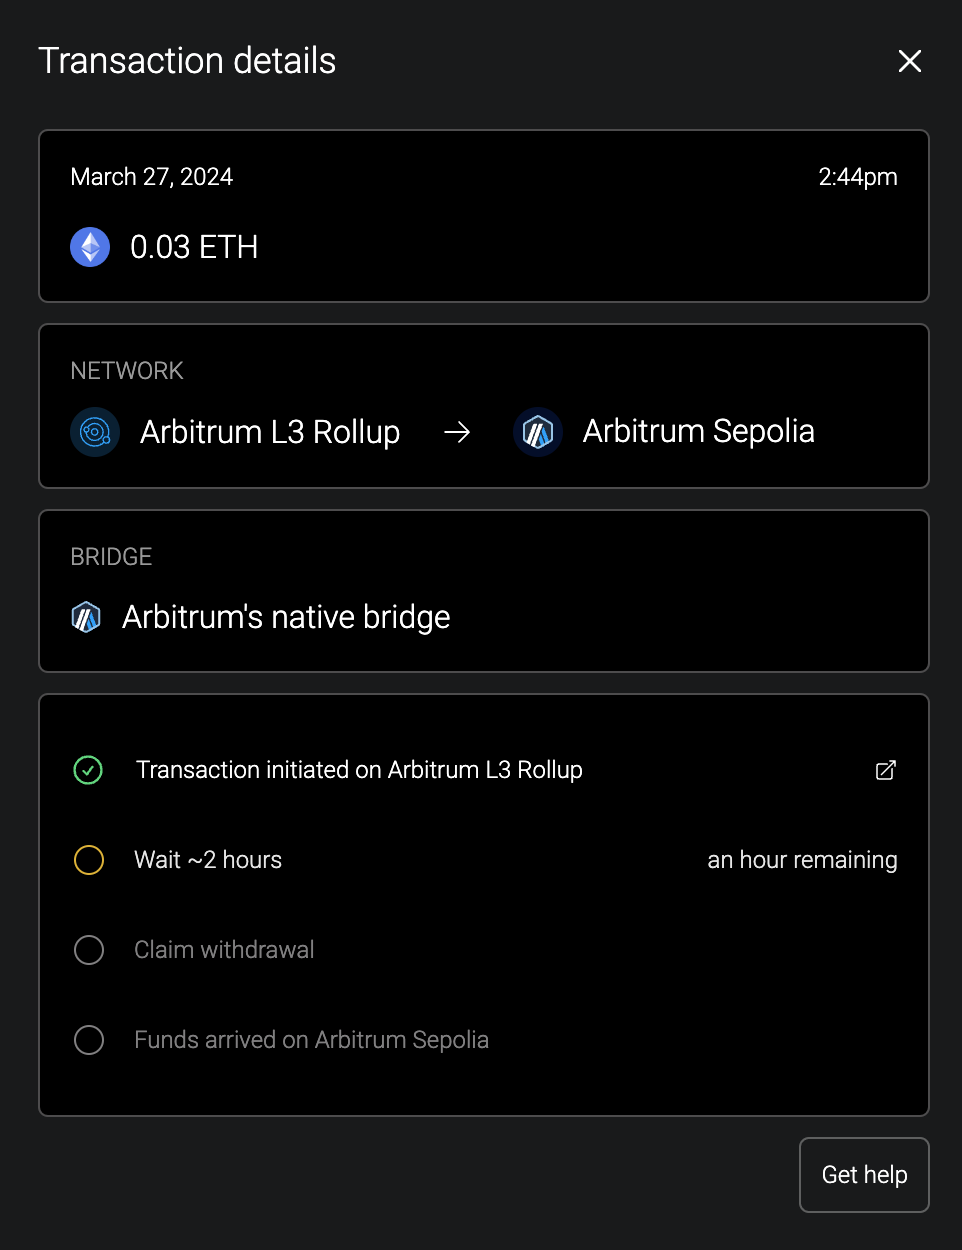
(1e) Click See details to see an overview of your withdrawal:
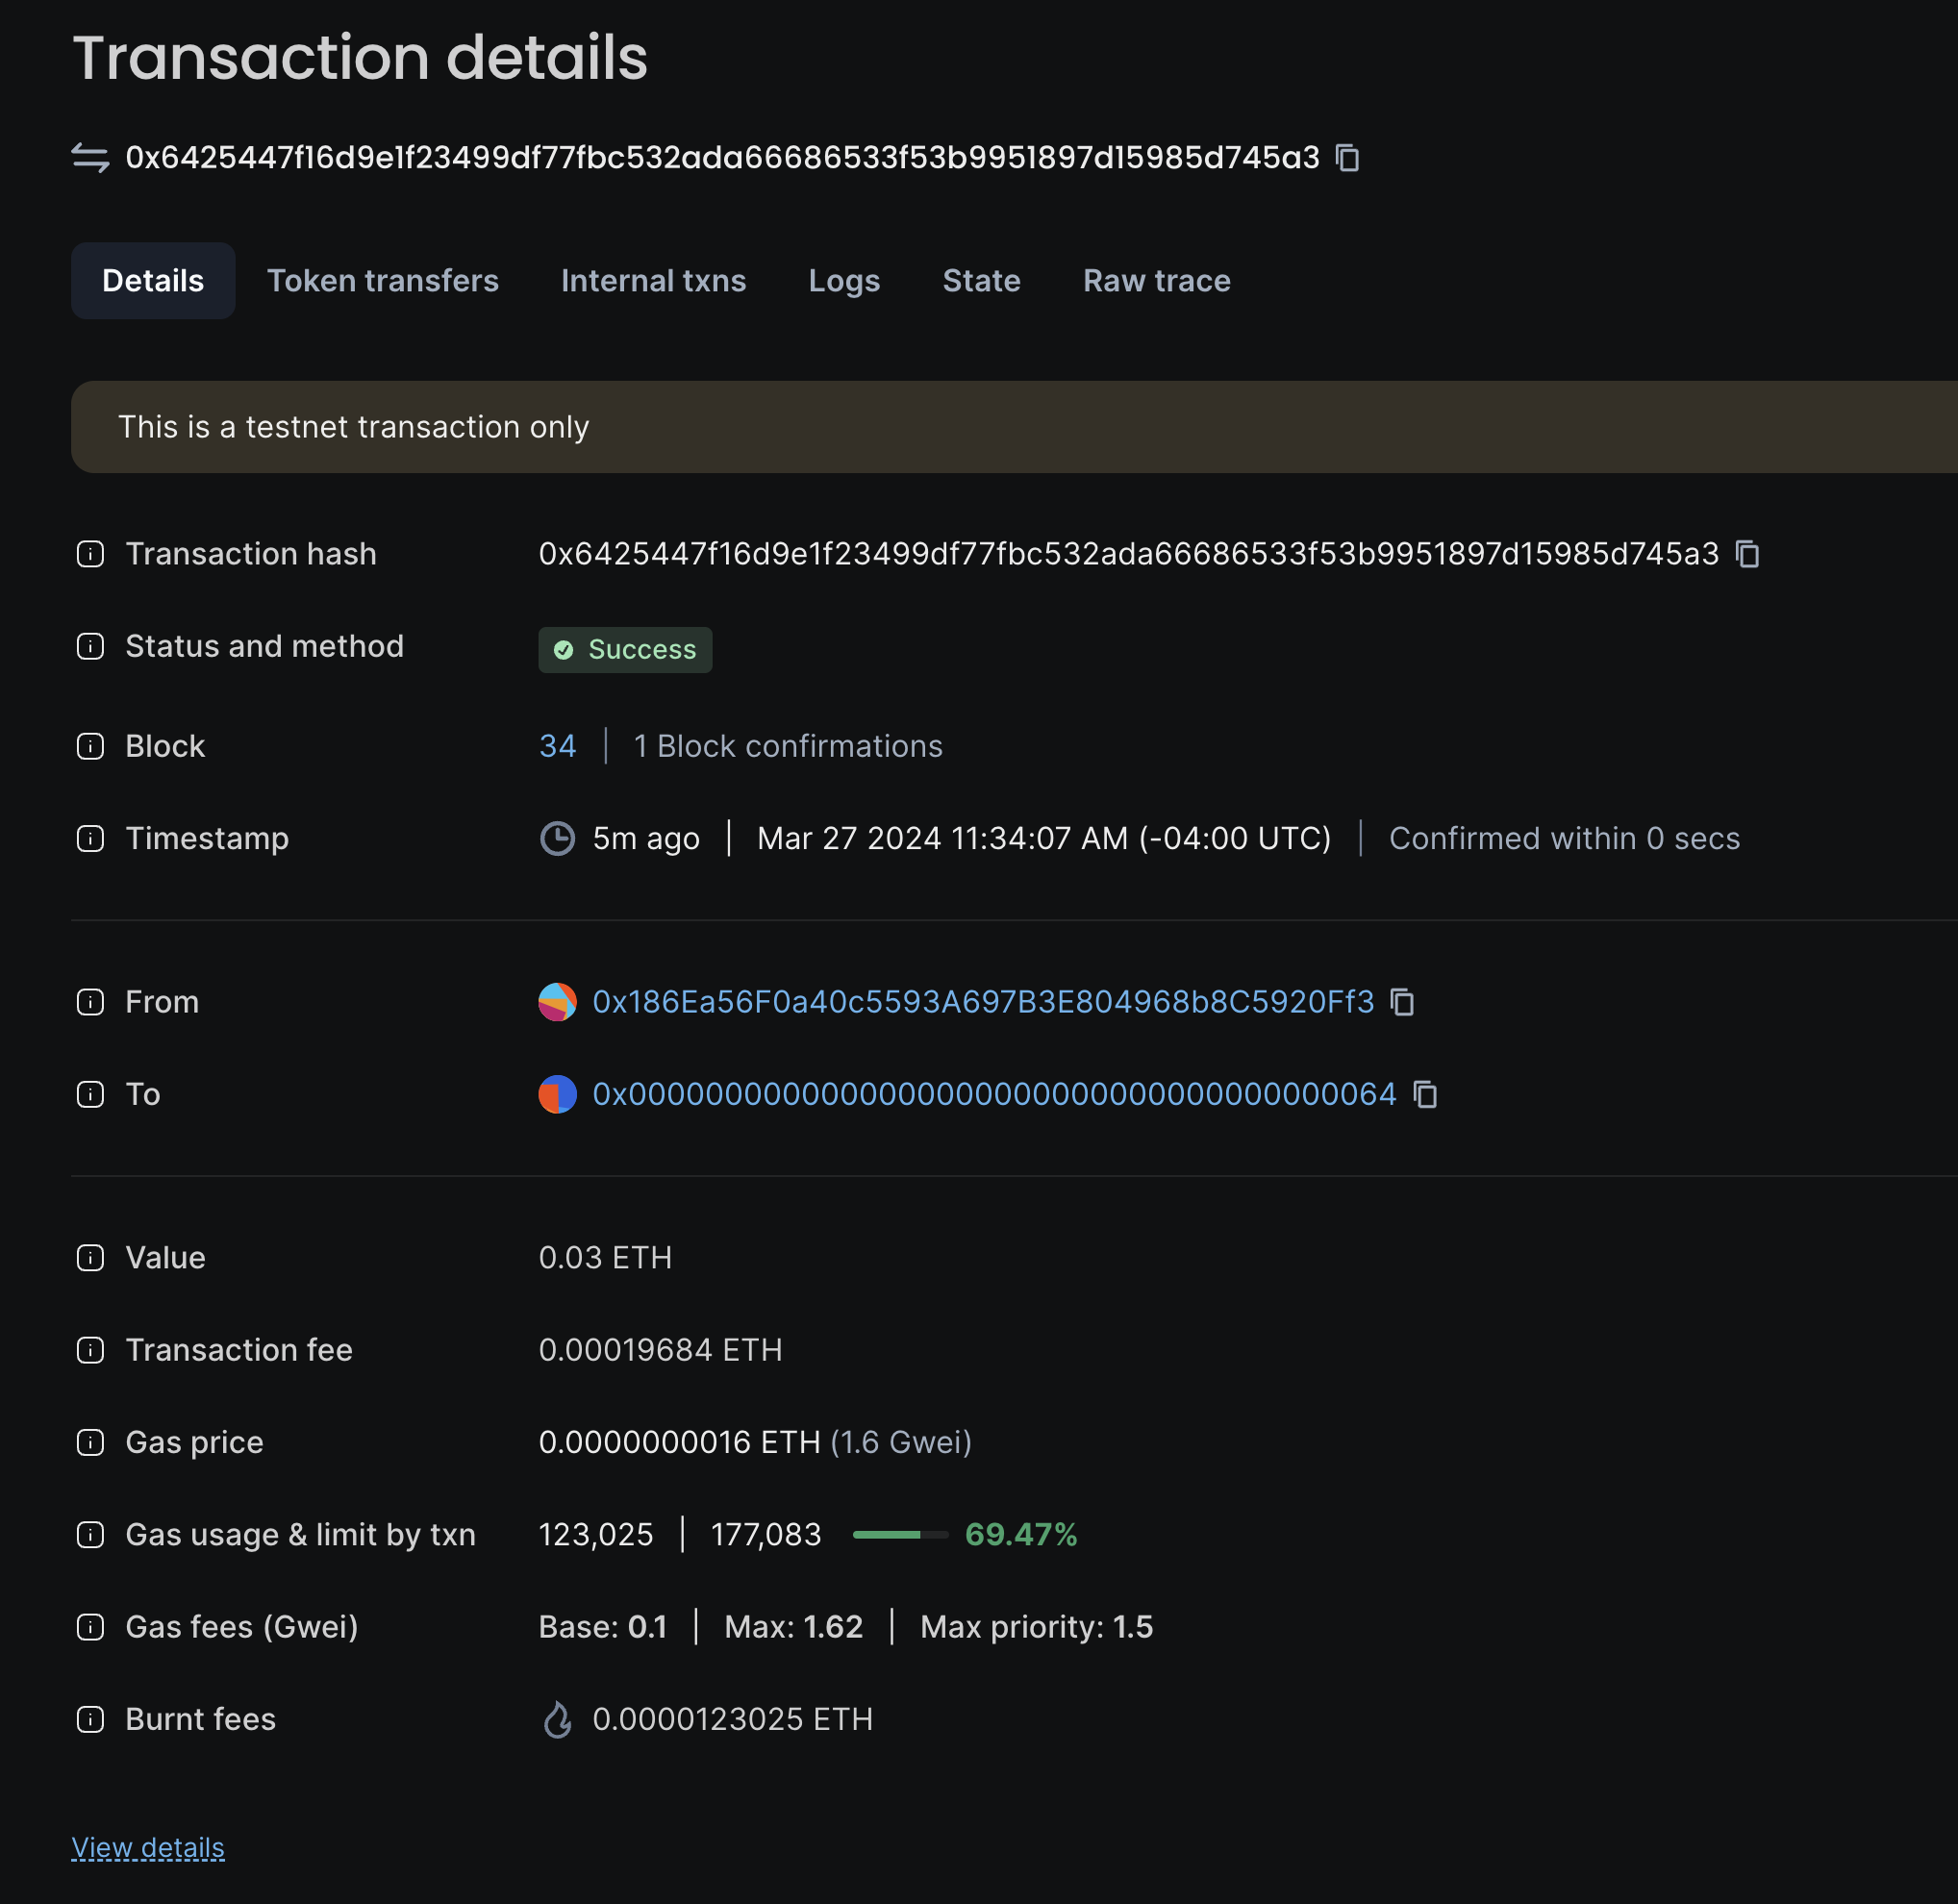
(1f) Optionally, view the transaction on your local explorer.
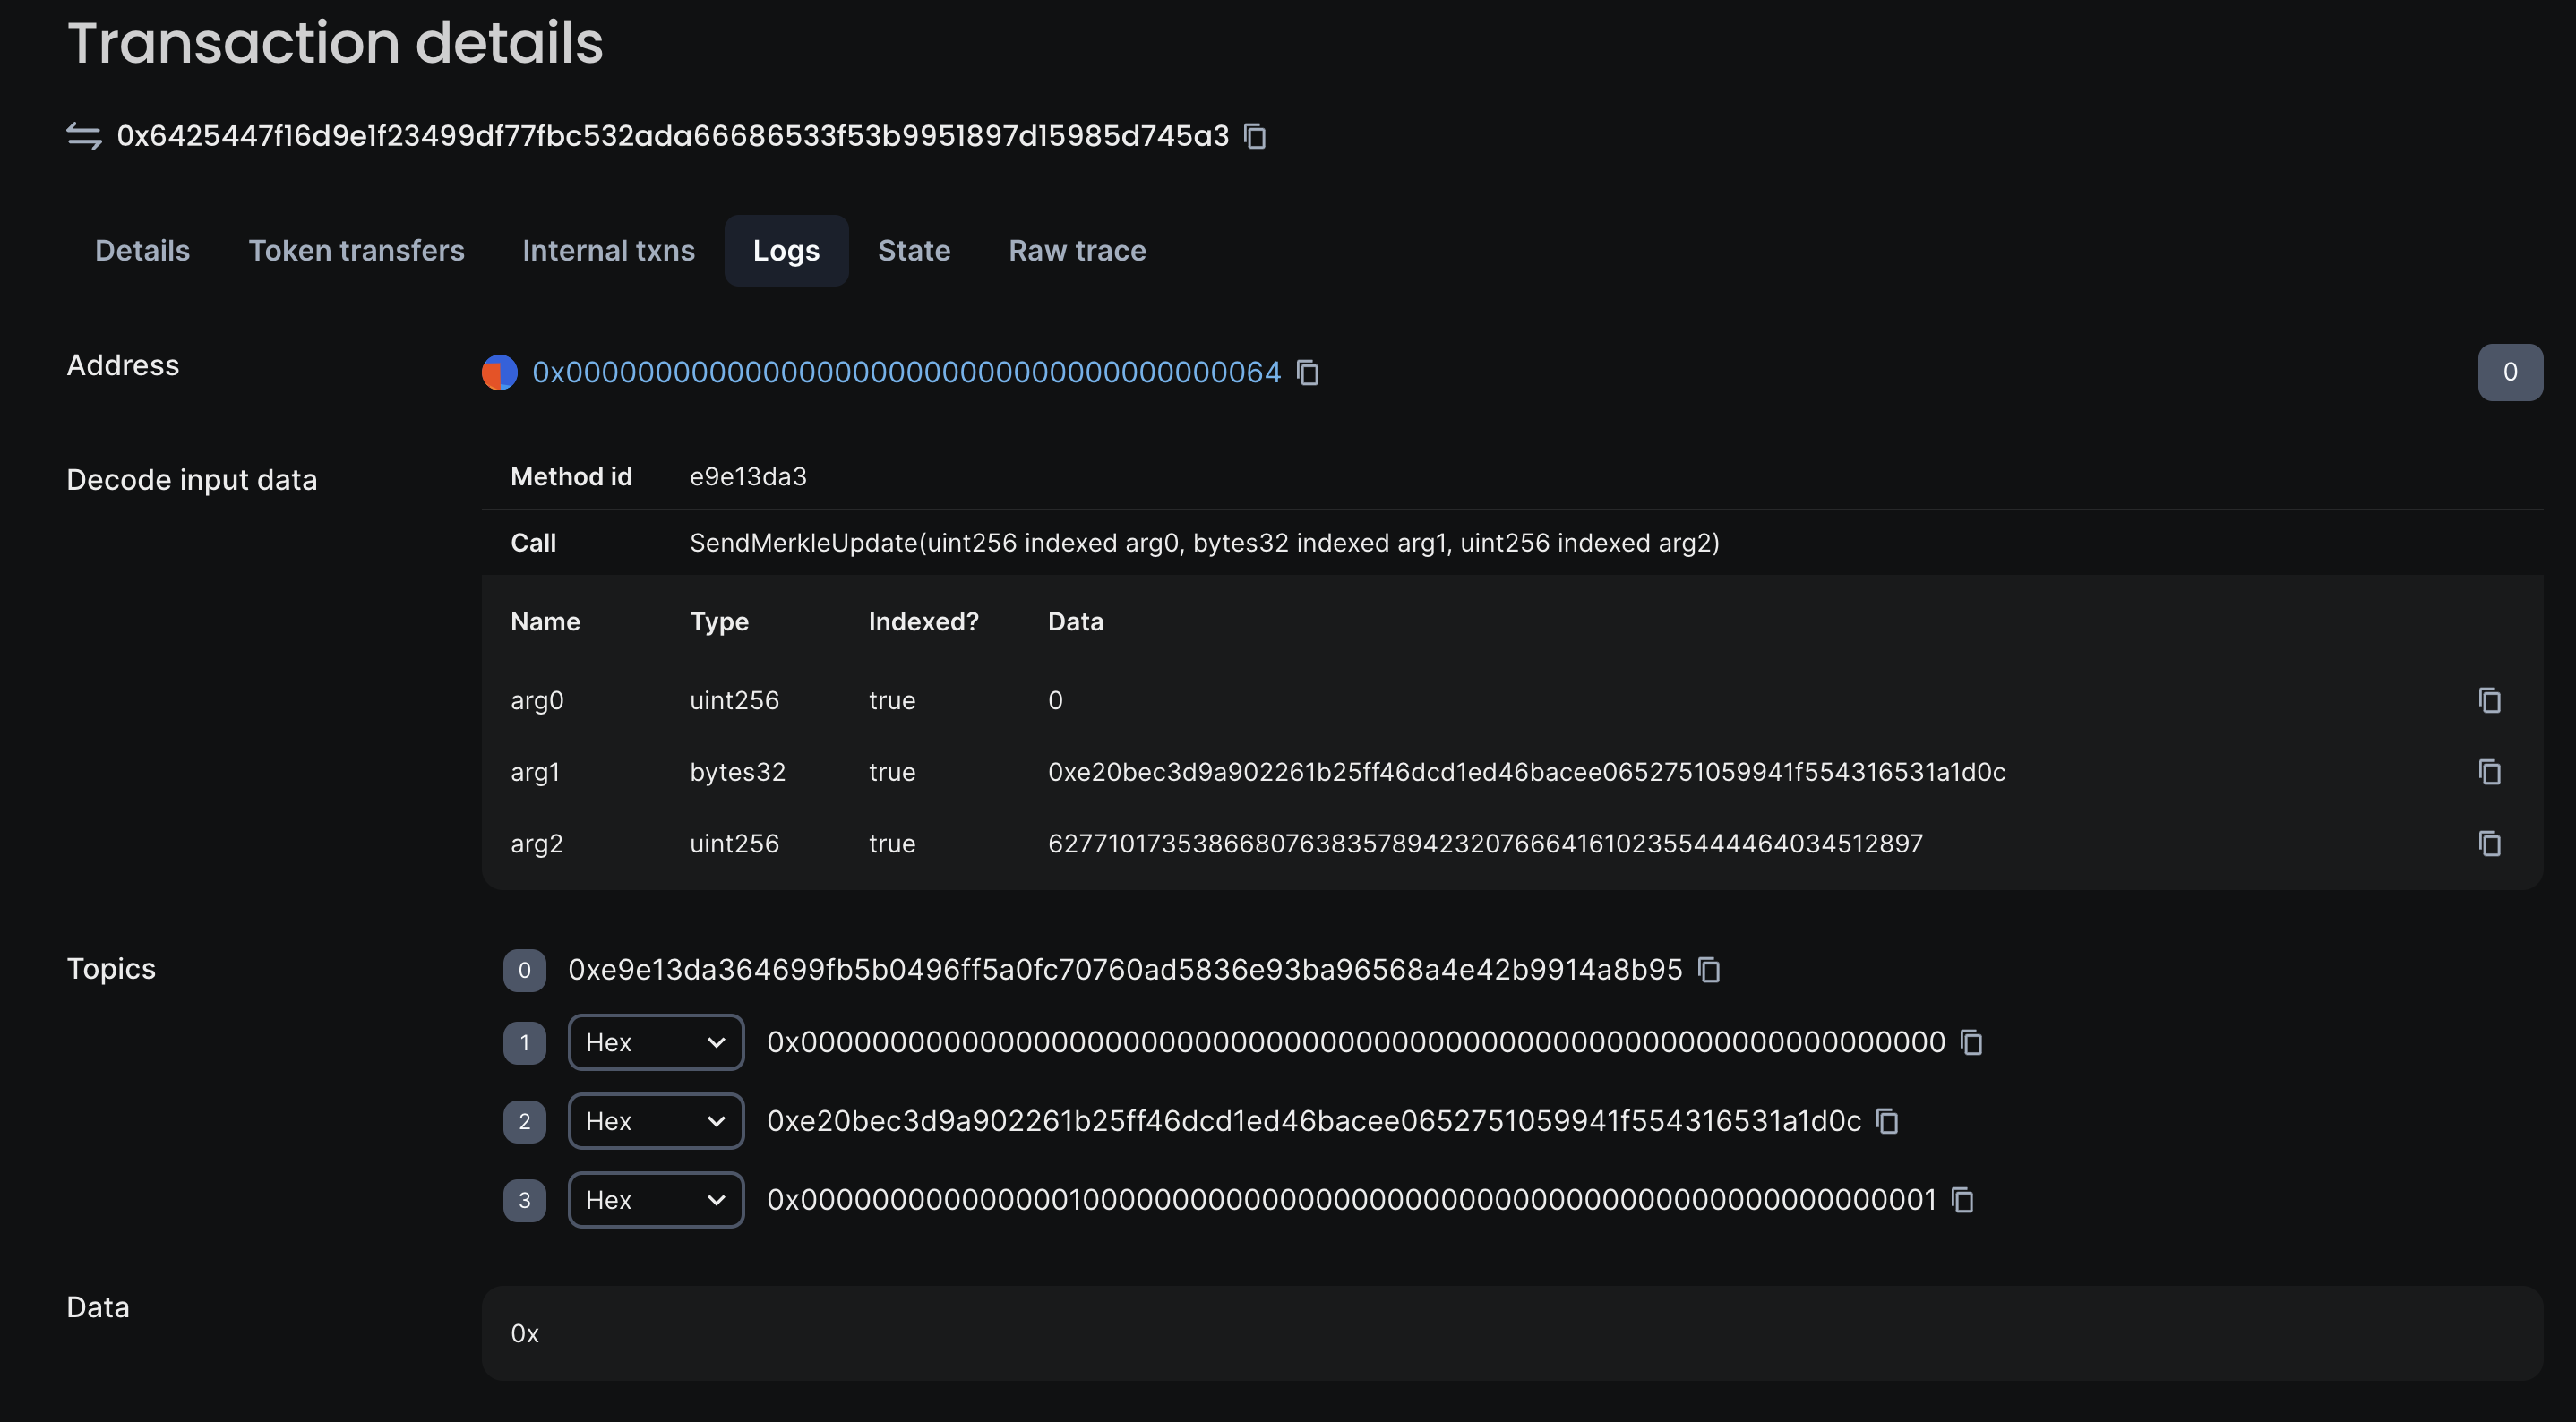
(1g) To learn more about what is going on, click the Logs tab:

Step 2: Claim your withdrawal
After approximately 2 hours, you will be able to claim your withdrawal.
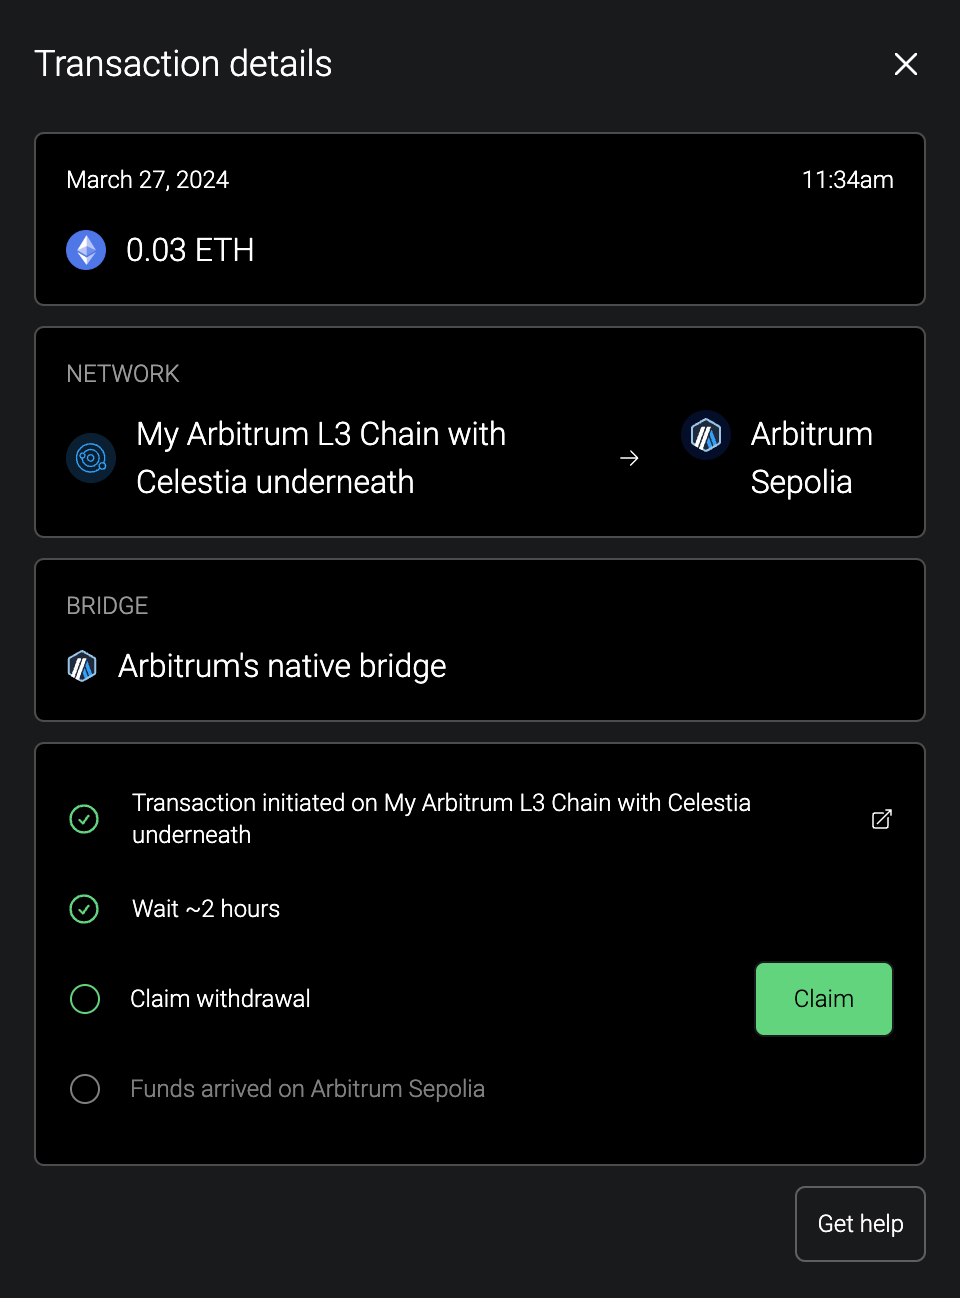
(2a) Head back to the bridge UI and you will have a notification to claim your withdrawal. Click Claim in the details of the transaction:
(2b) Approve the transaction in your wallet.
(2c) After your transaction goes through, you can see the details in the bridge UI under Settled transactions: