Setting up a Celestia full storage Node
This tutorial will guide you through setting up a Celestia full storage node, which is a celestia-node that doesn't connect to celestia-app (hence not a full consensus node), but stores all the data.
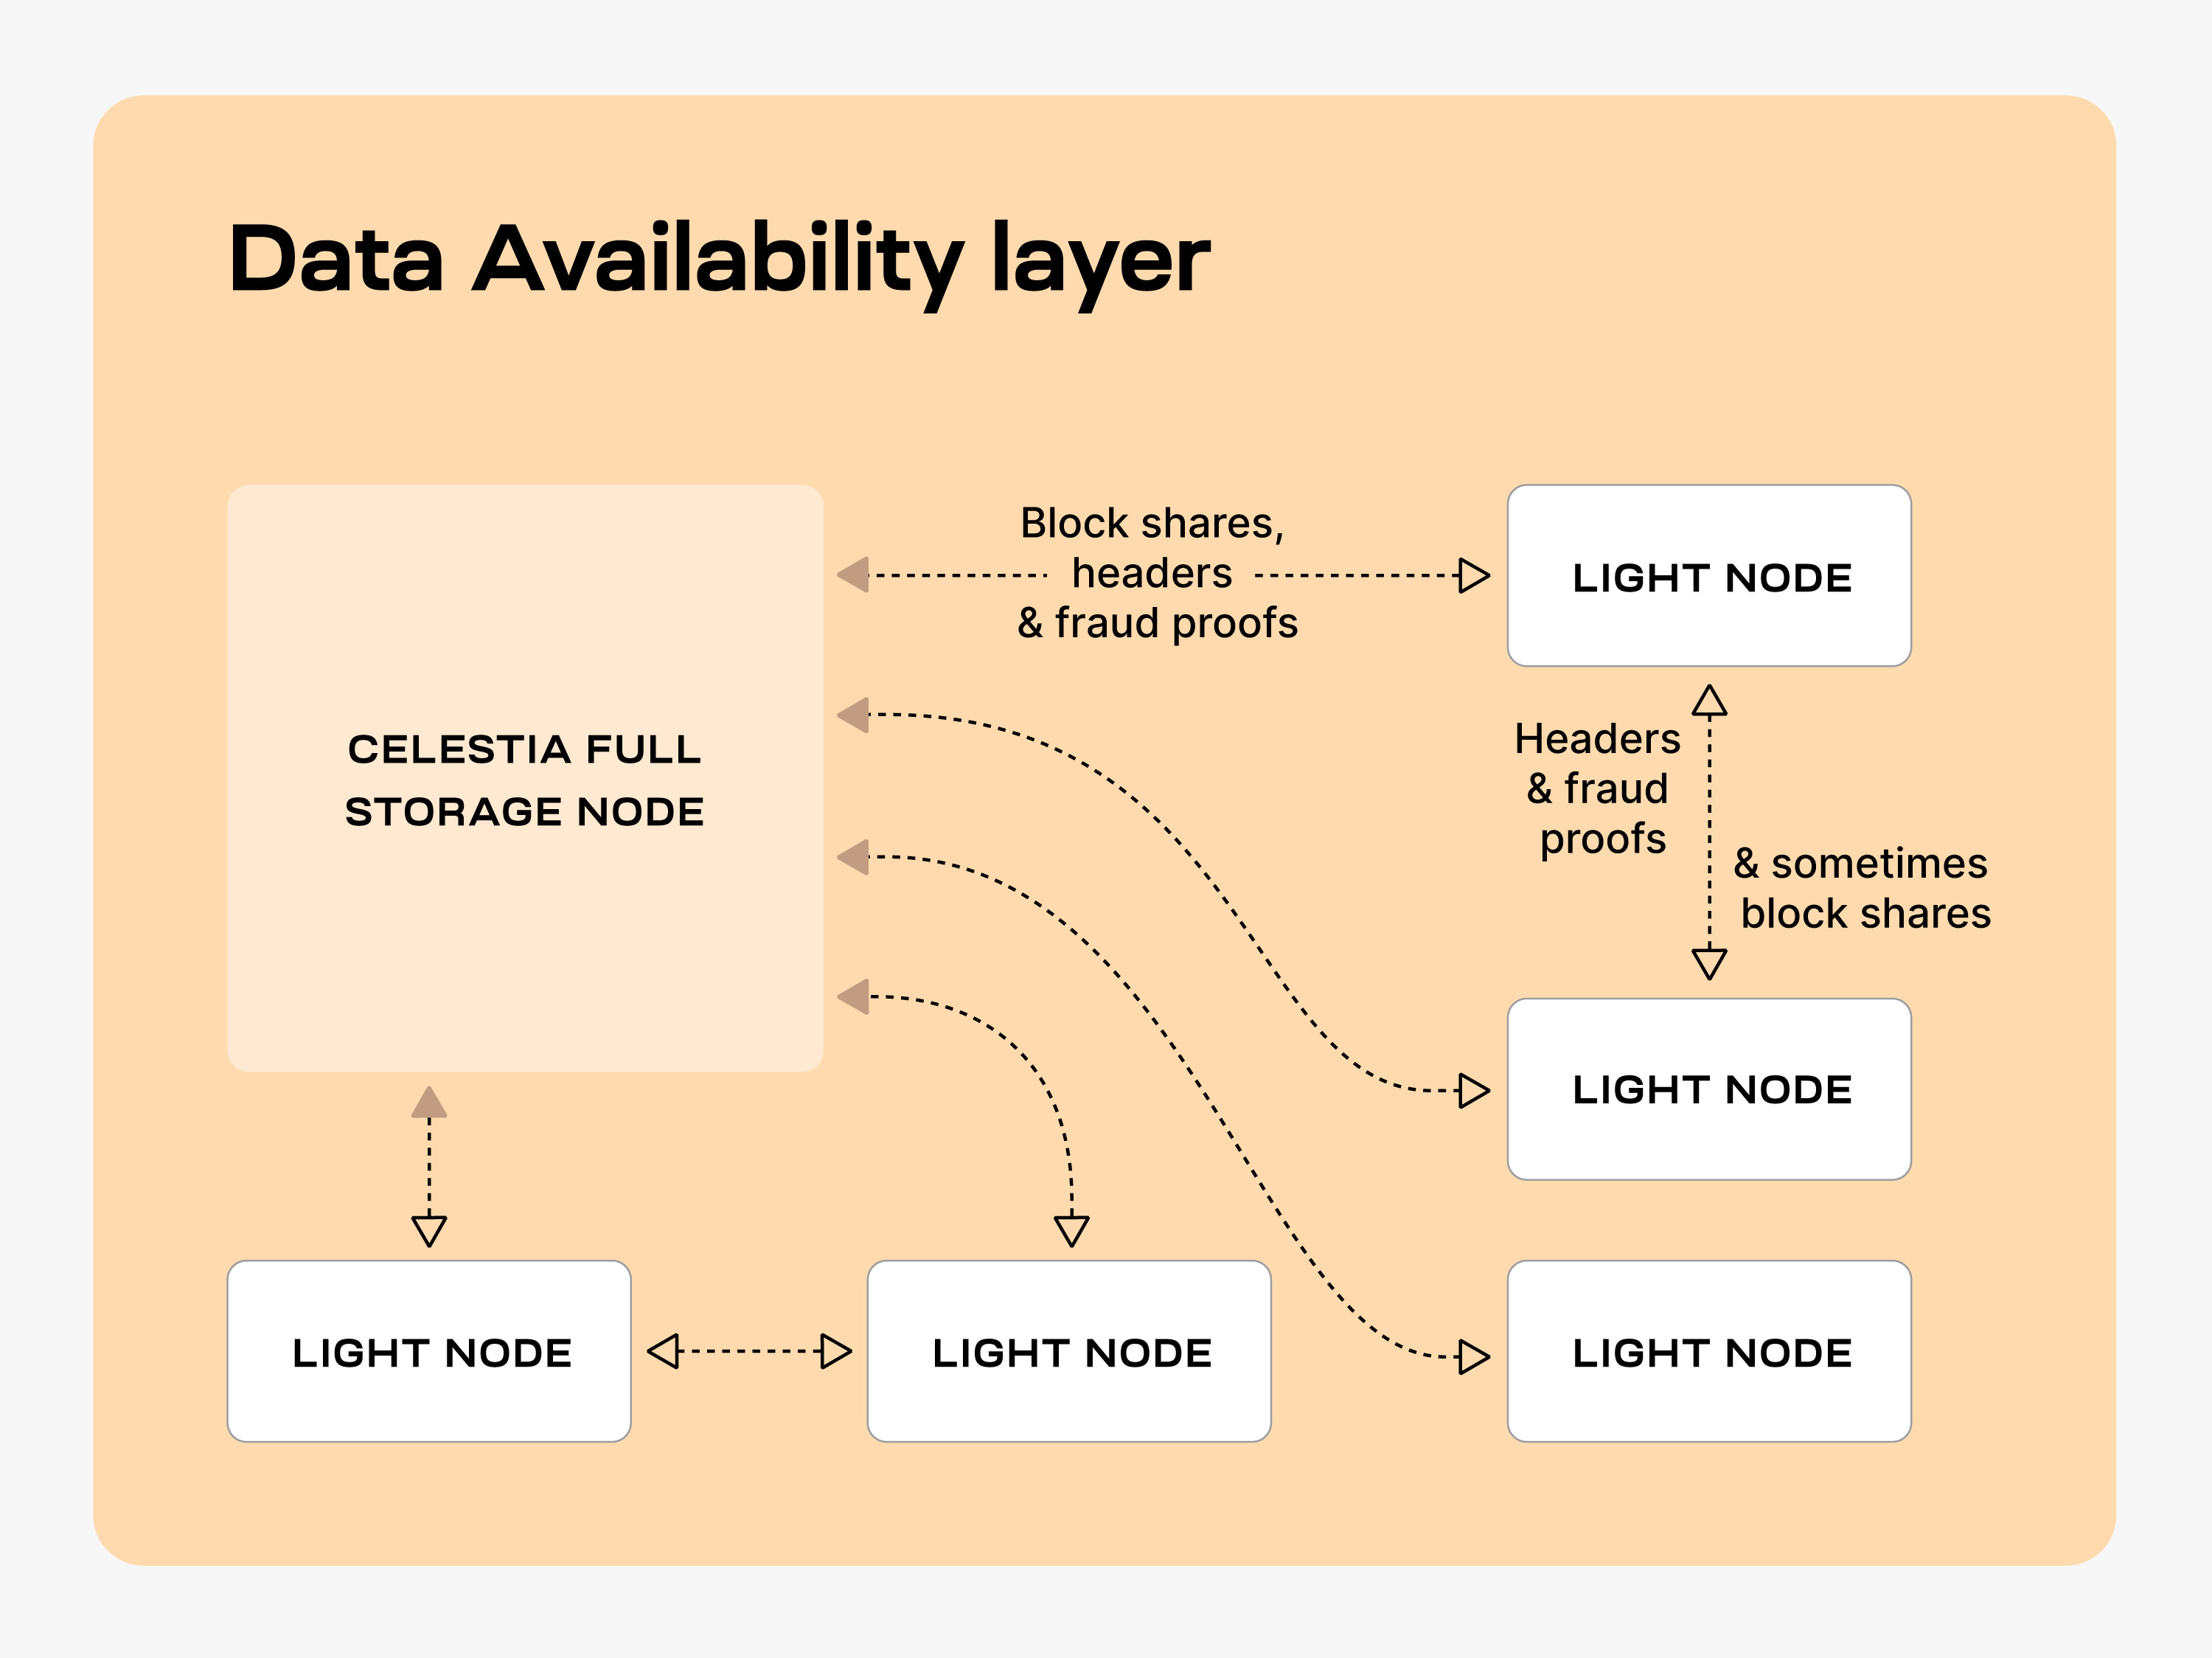
Overview of full storage nodes
Full storage nodes are Celestia nodes that store all the data. Full storage nodes send block shares, headers, and fraud proofs to light nodes. The light nodes gossip headers, fraud proofs, and sometimes block shares, between one another.
Hardware requirements
The following hardware minimum requirements are recommended for running the full storage node:
- Memory: 4 GB RAM (minimum)
- CPU: 6 cores
- Disk: 10 TB SSD Storage
- Bandwidth: 1 Gbps for Download/1 Gbps for Upload
Setting up your full storage node
The following tutorial is done on an Ubuntu Linux 20.04 (LTS) x64 instance machine.
Setup the dependencies
You can follow the tutorial for setting up your dependencies
Install celestia-node
You can follow the tutorial for installing celestia-node
Run the full storage node
Initialize the full storage node
Run the following command:
celestia full initcelestia full initcelestia full init --p2p.network mochacelestia full init --p2p.network mochacelestia full init --p2p.network arabicacelestia full init --p2p.network arabicaStart the full storage node
Start the full storage node with a connection to a validator node's gRPC endpoint (which is usually exposed on port 9090):
In order for access to the ability to get/submit state-related information, such as the ability to submit PayForBlob transactions, or query for the node's account balance, a gRPC endpoint of a validator (core) node must be passed as directed below.
Refer to the ports section of the celestia-node troubleshooting page for information on which ports are required to be open on your machine.
celestia full start --core.ip <URI>celestia full start --core.ip <URI>Using an RPC of your own, or one from the list on the Mocha testnet page or list on the Arabica devnet page, start your node.
You can create your key for your node by following the cel-key instructions
Once you start the full storage node, a wallet key will be generated for you. You will need to fund that address with testnet tokens to pay for PayForBlob transactions. You can find the address by running the following command:
./cel-key list --node.type full --keyring-backend test --p2p.network <network>./cel-key list --node.type full --keyring-backend test --p2p.network <network>TIP
You do not need to declare a network for Mainnet Beta. Refer to the chain ID section on the troubleshooting page for more information
You can get testnet tokens from:
NOTE
If you are running a full-storage node for your sovereign rollup, it is highly recommended to request Arabica devnet tokens as Arabica has the latest changes that can be used to test for developing your sovereign rollup. You can still use Mocha testnet as well, it is just mostly used for validator operations.
Optional: run the full storage node with a custom key
In order to run a full storage node using a custom key:
- The custom key must exist inside the celestia full storage node directory at the correct path (default:
~/.celestia-full/keys/keyring-test) - The name of the custom key must be passed upon
start, like so:
celestia full start --core.ip <URI> \
  --keyring.accname <name-of-custom-key> \
celestia full start --core.ip <URI> \
--keyring.accname <name-of-custom-key> \celestia full start --core.ip <URI> \
--keyring.accname <name-of-custom-key> \
--p2p.network mochacelestia full start --core.ip <URI> \
--keyring.accname <name-of-custom-key> \
--p2p.network mochacelestia full start --core.ip <URI> \
--keyring.accname <name-of-custom-key> \
--p2p.network arabicacelestia full start --core.ip <URI> \
--keyring.accname <name-of-custom-key> \
--p2p.network arabicaOptional: start the full storage node with SystemD
If you would like to run the full storage node as a background process, follow the SystemD tutorial.
With that, you are now running a Celestia full storage node.
Stop the full storage node
In order to gracefully stop the full storage node, use Control + C in the terminal window where the node is running. Be sure to only do this once as the shutdown will not be instantaneous.